How to Measure Blood Sugar at Home: Step-by-Step Guide (2026)
Learn the Correct Technique in 7 Simple Steps — From Hand Washing to Reading Your Result
Published December 18, 2025 • Category: Diabetes & Blood Sugar • Reading time: 8 minute
Why This Guide Matters
You’ve just received your blood glucose meter. You open the box and find test strips, lancets, a lancing device, and a 20-page instruction manual.
At first, it can feel overwhelming.
Many people worry about doing it wrong or causing pain, which leads them to avoid testing their blood sugar regularly.
But accurate blood sugar testing is essential. Incorrect readings can lead to poor decisions about insulin, medication, or diet.
The good news? Once you understand the process, testing your blood sugar becomes a quick routine that takes less than two minutes.
In this guide, you’ll learn:
- Exactly how to test your blood sugar step by step
- Which finger to use
- The best times to test during the day
- How to interpret the results
- Common mistakes to avoid
Table of Contents
- Why Blood Sugar Testing Is Important
- What You Need
- The 7 Steps to Test Correctly
- When to Test During the Day
- How to Interpret Your Results
- 8 Common Mistakes to Avoid
- Frequently Asked Questions
- Recommended Tools and Next Steps
Why Measuring Your Blood Sugar Is Essential
Home blood sugar monitoring is more than a medical routine—it’s one of the most effective ways to understand how your body responds to food, medication, exercise, and stress.
Without testing, you’re making decisions without reliable information.
Benefits of Daily Monitoring
- Detect low blood sugar (hypoglycemia) early
- Identify high blood sugar (hyperglycemia)
- Evaluate whether medication is working
- Understand how meals affect your glucose
- Stay motivated by tracking progress over time
What You Need: Your Complete Testing Kit
Before you begin, make sure you have:
- Blood glucose meter
- Compatible test strips
- Lancing device
- Sterile lancets
- Cotton ball or gauze
- Blood sugar logbook or smartphone app
💡 Practical Tip: Bluetooth-enabled meters automatically sync your readings to your phone, saving time and reducing manual entry errors.
The 7 Steps to Measure Blood Sugar Correctly
Step 1: Wash Your Hands with Soap and Water
Wash your hands with warm water and soap for at least 20 seconds, then dry them thoroughly.
Why It Matters
Residues from fruit, sugar, or food can significantly alter your reading.
Avoid alcohol-based hand sanitizers immediately before testing.
💡 Warm water improves circulation and makes it easier to obtain a blood drop.
Step 2: Prepare the Lancing Device
- Remove the cap.
- Insert a new sterile lancet.
- Twist off the protective cover.
- Replace the cap.
- Set the depth level (typically 2–4).
Why It Matters
The correct depth ensures enough blood with minimal discomfort.
Step 3: Insert the Test Strip
Insert a new test strip into the meter.
The device will turn on automatically and display a flashing blood drop symbol.
Why It Matters
Do not use expired or improperly stored strips.
⚠️ Heat and humidity can make strips unreliable.
Step 4: Lance the Side of Your Finger
Use the side of your fingertip—preferably the middle or ring finger.
Why the Side?
- Less painful
- Better blood flow
- Less interference with daily activities
💡 Rotate fingers regularly to avoid soreness and calluses.
Step 5: Obtain a Blood Drop
Gently massage your finger from base to tip to form a small drop of blood.
A drop about the size of a pinhead is usually sufficient.
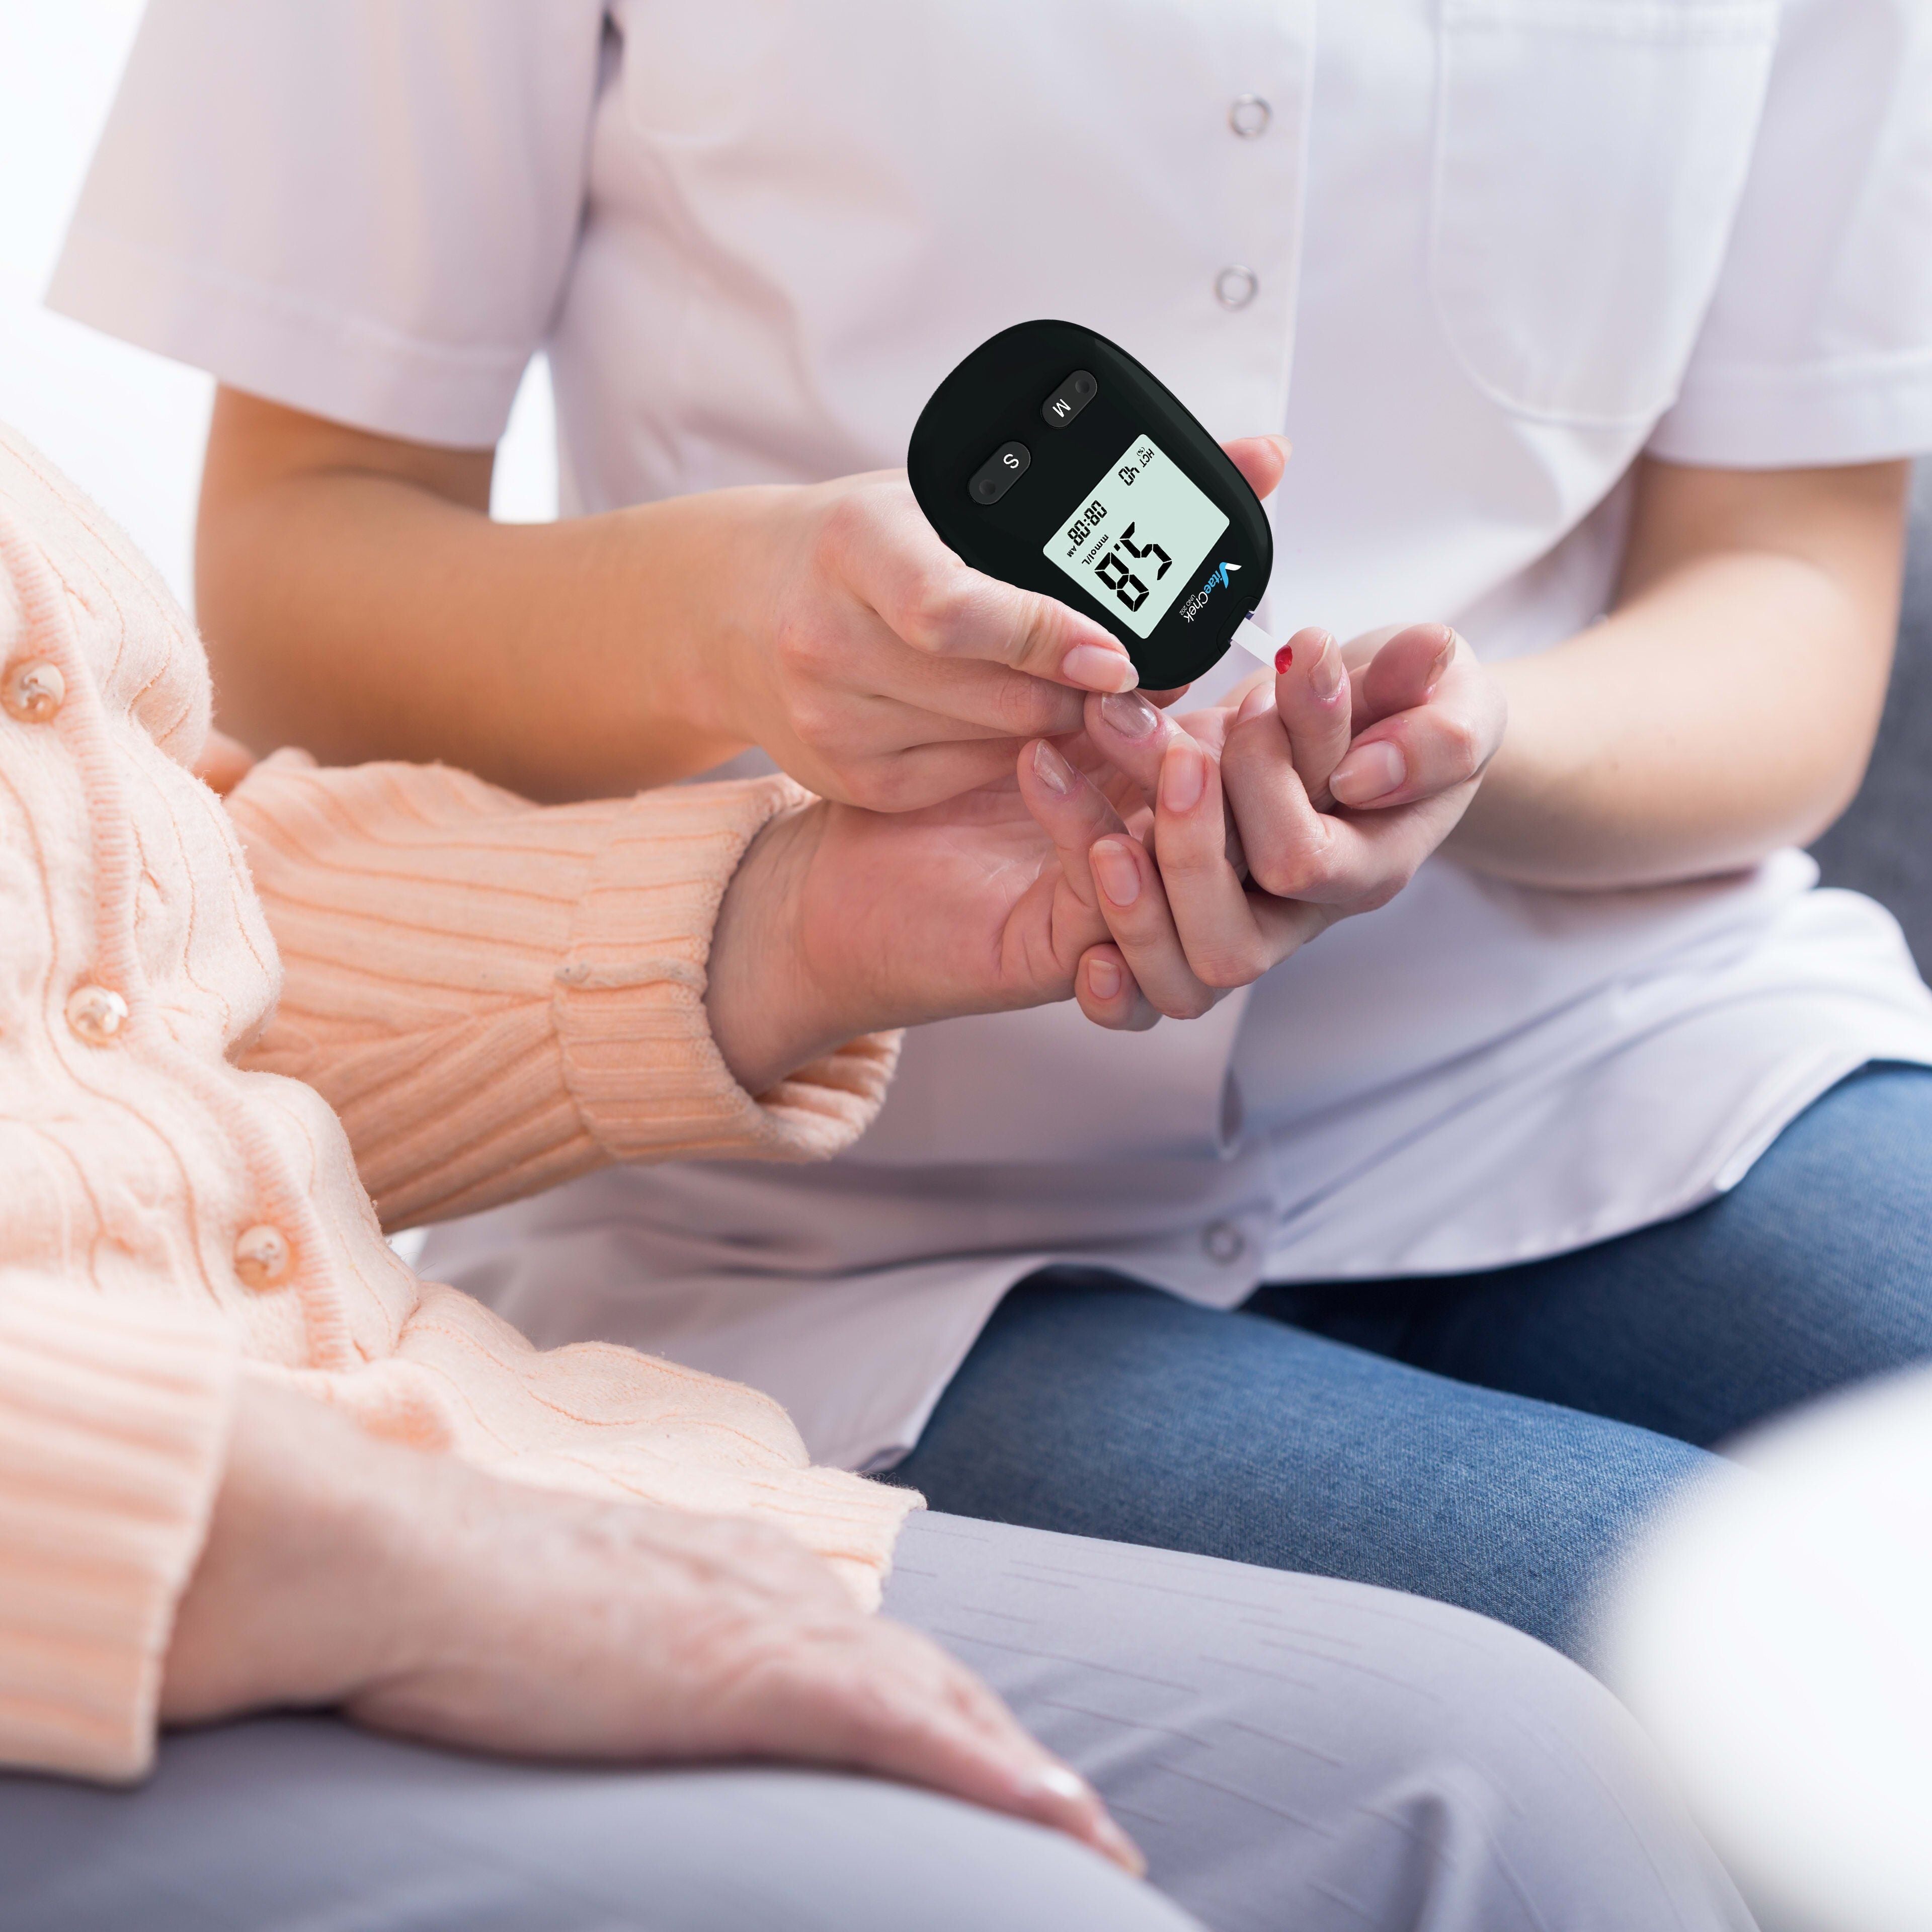
Step 6: Apply Blood to the Test Strip
Touch the edge of the strip to the blood drop.
The strip will automatically draw in the sample.
Do not smear the blood.
Step 7: Read and Record the Result
After a few seconds, your blood glucose result will appear.
Record:
- Value
- Date
- Time
- Context (fasting, before meal, after meal)
Bluetooth meters can save this information automatically.
When to Measure During the Day
| Timing | When | Why |
|---|---|---|
| Fasting | First thing in the morning | Shows overnight glucose control |
| Before meals | Before breakfast, lunch, dinner | Helps assess baseline levels |
| 2 hours after meals | After eating | Shows how food affects glucose |
| Before bedtime | At night | Helps prevent overnight lows |
How to Interpret Your Results
| Situation | Typical Non-Diabetic Range | Common Diabetes Target* |
|---|---|---|
| Fasting | 70–99 mg/dL | 80–130 mg/dL |
| 2 hours after meals | < 140 mg/dL | < 180 mg/dL |
*Targets vary by individual and should be confirmed with your healthcare provider.
If Your Reading Is:
- Below 70 mg/dL: Treat low blood sugar promptly with fast-acting carbohydrates.
- Repeatedly above 250 mg/dL: Contact your doctor.
- Extremely high or accompanied by severe symptoms: Seek urgent medical attention.
8 Common Mistakes to Avoid
- Not washing your hands
- Using the same finger repeatedly
- Puncturing the center of the fingertip
- Using expired strips
- Reusing lancets too many times
- Applying too little blood
- Failing to record the testing context
- Comparing readings from different fingers too closely
Frequently Asked Questions
Do I need to disinfect my finger?
No. Washing with soap and water is usually sufficient.
Can I reuse lancets?
Some people do, but using a new lancet each time is more hygienic and generally more comfortable.
Why is my meter different from the lab result?
Home meters are designed for self-monitoring and may differ slightly from laboratory results while still being clinically useful.
Can I test on my arm instead of my finger?
Some meters allow alternate site testing, but fingertip testing is generally preferred when glucose may be changing rapidly.
Recommended Glucose Meter for 2026
VitaeChek G1 Pro
Designed to make blood sugar testing simple and reliable.
Key Features
- Automatic coding
- Bluetooth synchronization
- Large memory capacity
- Results in 5 seconds
- Easy-to-read display
Included in the Kit
- G1 Pro glucose meter
- 50 test strips
- 50 lancets
- Lancing device
- Travel case
Next Steps
- Download a 90-day blood sugar log
- Learn more about Type 2 diabetes management
- Bring your recent readings to your next medical appointment
Conclusion
Testing your blood sugar correctly is a simple skill that can have a major impact on your health.
Once it becomes part of your routine, it takes less than two minutes and gives you valuable information to guide your daily decisions.
Every accurate measurement is a step toward better diabetes control and greater peace of mind.
📞 Questions? Contact the VitaeChek support team or leave a comment below. We’re here to help you monitor your health with confidence.
Share:
Type 2 Diabetes: A Complete Guide to Symptoms, Causes, and Treatments (2026)
GDH vs. GOD: Which Technology for Your Glucose Meter? 2026 Guide